Best Price on 70011 Swaged Hose Fiting for Surabaya Manufacturer
Best Price on 70011 Swaged Hose Fiting for Surabaya Manufacturer Detail:
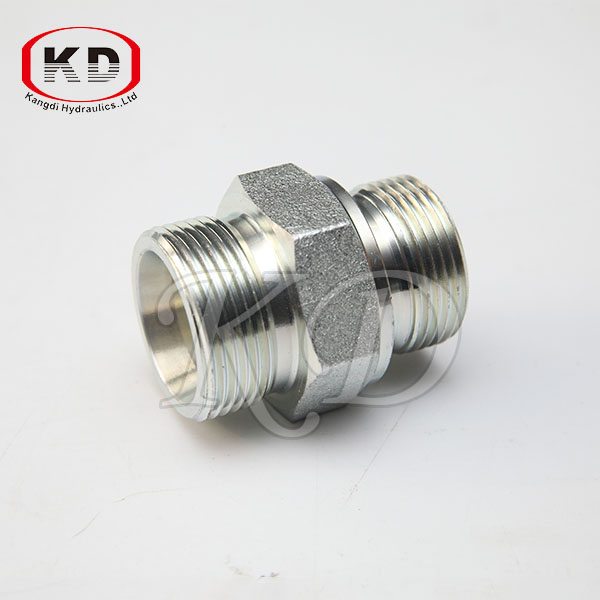
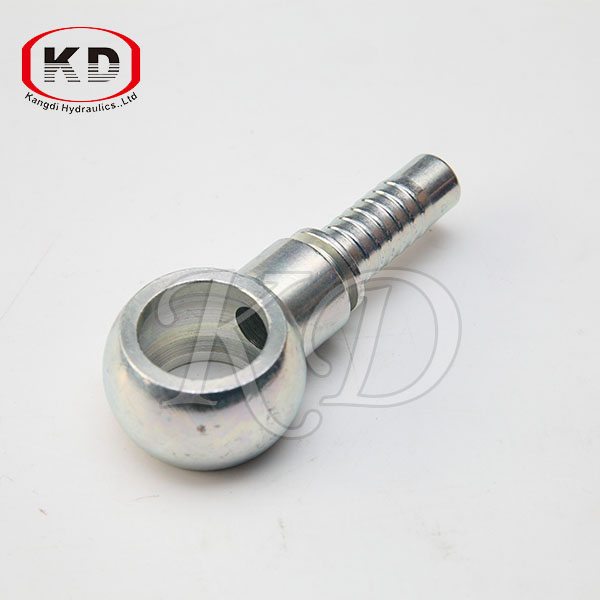
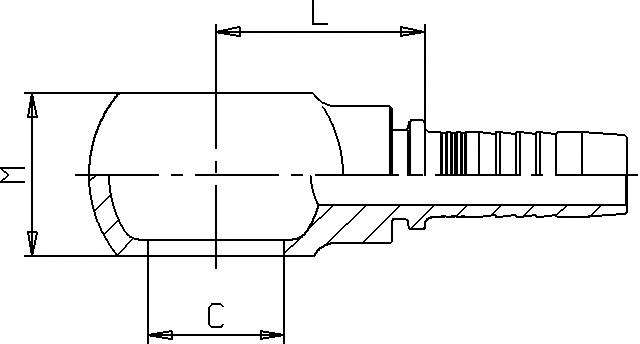
METRIC BANJO
|
PART NUMBER |
HOSE |
BOLT THREAD |
|
L mm |
C mm |
M mm |
||
|
|
DN |
In |
SIZE |
|
|
|
|
|
| S700A0 – 04 – 12 | 6 | 1/4″ | 04 | M12x1,5 | 22,3 | 12,1 | 12 | |
| S700A0 – 04 – 14 | 6 | 1/4″ | 04 | M14x1,5 | 24,3 | 14,1 | 14 | |
| S700A0 – 05 – 14 | 8 | 5/16″ | 05 | M14x1,5 | 24,3 | 14,1 | 14 | |
| S700A0 – 06 – 16 | 10 | 3/8″ | 06 | M16x1,5 | 26,8 | 16,1 | 16 | |
| S700A0 – 06 – 18 | 10 | 3/8″ | 06 | M18x1,5 | 28,8 | 18,1 | 20 | |
| S700A0 – 08 – 18 | 12 | 1/2″ | 08 | M18x1,5 | 29,1 | 18,1 | 20 | |
| S700A0 – 08 – 22 | 12 | 1/2″ | 08 | M22x1,5 | 32,1 | 22,1 | 25 | |
| S700A0 – 10 – 22 | 16 | 5/8″ | 10 | M22x1,5 | 32,2 | 22,1 | 25 | |
| S700A0 – 12 – 26 | 20 | 3/4″ | 12 | M26x1,5 | 38,1 | 26,1 | 30 | |
Product detail pictures:
Related Product Guide:
How to Replace a Hydraulic Hose Fitting
Things to Know About Pipe Fitting Works
Along with the Client-Oriented enterprise philosophy, a rigorous high-quality control process, superior production products along with a robust R&D group, we constantly deliver premium quality products, exceptional solutions and aggressive costs for Best Price on 70011 Swaged Hose Fiting for Surabaya Manufacturer, The product will supply to all over the world, such as: Turkmenistan, Manchester, Yemen, We pay high attention to customer service, and cherish every customer. We've maintained a strong reputation in the industry for many years. We are honest and work on building a long-term relationship with our customers.
Rough steps for w-body fuel pump replacement at bottom of descriptions. Supplies list below ~
Fuel Pump – https://goo.gl/orheok
Low profile 1/4″ ratchet – https://goo.gl/No7HFj
Metric 1/4″ Socket Set – https://goo.gl/YN38Pn
1/4″ Socket Extensions – https://goo.gl/jf9X2j
Screwdriver Set – https://goo.gl/3qOkk9
Wire strippers – https://goo.gl/79dTSa
Snap Ring Plyers – https://goo.gl/g5wj56
Fuel Pressure Guage – https://goo.gl/S9gKxb
Fuel Siphon – https://goo.gl/NgwvNx
5 Gallon Fuel Canister – https://goo.gl/15EbXo
or 2.5 Gallon Fuel Canister – https://goo.gl/yUaFXs
Duck / duct tape – https://goo.gl/GHAKYv
Lubricant for O-Ring / Tank Seal – https://goo.gl/XEvgEH
Shop Towels – https://goo.gl/NnX5Qq
Gloves – https://goo.gl/KLwcOA
Shop Vac – https://goo.gl/3kVec1
These are affiliate links
DO THIS AT YOUR OWN RISK. I ACCEPT NO RESPONSIBILITY FOR YOUR WORK. THIS IS FOR INFORMATIONAL PURPOSES ONLY.
This procedure should be similar for any W-body car, Buick Century, Buick LaCrosse, Buick Regal, Chevrolet Impala
Chevrolet Impala Limited, Chevrolet Lumina, Chevrolet Monte Carlo, Oldsmobile Cutlass Supreme, Oldsmobile Intrigue, Pontiac Grand Prix ~ As demonstrated on 1998 Buick Century. Pleasure double check your car to ensure this will work.
NOTE: Best done with LOW tank close to empty. WORK IN WELL VENTILATED AREA! ALL CAR WINDOWS OPEN. TRUNK OPEN AND FAN TO PURGE OUT GAS FUMES.
Step 1 – Test fuel pump using test port on fuel rail. Normal operation at idle or prior to starting car (ignition on) should be between 35-40 PSI roughly (double check for your car).
Step 2 – Relieve fuel pressure. Pull fuel pump fuse and crank engine until it stalls.
Step 3 – Disconnect battery.
Step 4 – Open all garage doors and place fan in room.
Step 5 – Expose pump access panel. Clean trunk and remove spare tire. Remove back seat. Open trunk carpeting at seam.
Step 6 – Remove pump access panel. Use 10 mm socket.
Step 7 – Clean top of tank before removing pump. Use a tooth brush, mild cleaner, and shop vac to clean up and avoid dumping debris in tank.
Step 8 – Disconnect top of pump electrical connectors. Tape electrical connectors to side.
Step 9 – Use snap ring pliers to remove pump snap ring.
Step 10 – Disconnect fuel lines. Residual fuel will be in line so set rags underneath. Carefully disconnect the lines and save the line quick connect clips.
Step 11 – Carefully lift pump out allowing gas in the pump to drain into the tank. Save your o-ring seal as the new one may not fit.
Step 12 – Siphon out as much of the remaining gas as practical. Look to ensure tank is clean. If it is not you’ll need to drop it and clean the tank out. Not covered in this procedure however, this is one of the easiest tanks I’ve ever removed before.
Step 13 – Generously lubricate the o-ring seal and place it in the pump opening on the tank.
Step 14 – Gently lower the pump into the tank ensuring not to damage the input screen or level float.
Step 15 – Connect the fuel lines with the pump free.
Step 16 – Slide the snap ring on top of pump.
Step 17 – Using pressure but not so as to break pump, wiggle the pump as pressing down into the tank. It will eventually seat all the way in. This takes a LOT of effort. Tip slip the ring clamp into areas which it fits and continue wiggling until you’ve got the whole pump lock in place.
Step 18 – Splice in your new pumps connector (if necessary). Then connect the new pump.
Step 19 – Replace your fuel pump fuse and reconnect the battery.
Step 20 – While carefully watching the top of the fuel pump, turn your ignition to on. The pump will turn on and you should see NO LEAKS on the lines for the pump. If you do you need to better connect the fuel lines to the pump.
Step 21 – Start your car and take a closer look at top of pump while idling. Also look under hood to doubly check fuel line connections.
Step 22 – Re-install pump cover, back seat, and enjoy!
Troubleshooting / Check engine light is on.
If your car is throwing a engine code, chances are the o-ring seal did not seat correctly on your pump. Unfortunately you’ll have to re-install your pump to see that it does. While you’re re-installing the o-ring seal pull your ECM fuse to reset your DTC codes / engine light. Once you’ve got everything back up and running, let the car idle for a while. Your check engine light will go off after about 5 minutes if your codes didn’t reset but you did the repair correctly.
DYI, How to make your Harbor Freight hose reel work better.
The goods are very perfect and the company sales manager is warmful, we will come to this company to purchase next time.